![]()
![]()

Raccoon Media Group is excited to announce that Fabletics will join this year’s brand roster that is gaining momentum at ISPO 2026. Fabletics will not only be exhibiting this year but will also be official partner of the Athlete & Influencer Programme which will be powered by Fabletics.
Fabletics, the global active lifestyle brand known for combining performance-driven activewear with fashion-forward design for both women and men, has confirmed its participation at ISPO 2026, where the brand will showcase its latest collections and connect with retailers, buyers, athletes, media and creators from across the global sports and active lifestyle industry.
Taking place in Amsterdam from 3–5 November 2026, ISPO 2026 marks Fabletics’ return to the event following the brand’s previous presence at ISPO 2024. As part of its expanded involvement this year, Fabletics will also partner with ISPO on the ISPO Athlete & Influencer Programme, creating new opportunities for the brand to engage directly with its ambassador and creator community in person.
The partnership reflects Fabletics’ continued investment in building meaningful connections across both wholesale and creator channels as the brand continues to expand its global presence.
“We’re incredibly excited to be part of this new chapter for ISPO and to join the event in Amsterdam,” said Mark Ralea, General Manager Fabletics Europe. “The move to Amsterdam and the fresh direction for ISPO creates an exciting opportunity for brands, athletes, creators and the wider industry to come together in a more connected and culturally relevant way. ISPO provides a fantastic platform for us to showcase the continued investment we’re making in the Fabletics brand, build strong relationships across the industry and present our latest collections and vision to the market as a whole.”
While Fabletics has built significant success through its subscription-led VIP membership model, the brand continues to see wholesale and physical retail as an important part of its long-term growth strategy, working alongside its direct-to-consumer business rather than competing with it.
Through its wholesale retail partnerships, consumers are able to purchase Fabletics products without a VIP membership, creating greater accessibility to the brand while offering retail partners a differentiated proposition within the activewear market.
“Retail gives consumers the opportunity to purchase standalone products while also allowing them to experience the quality, fit and performance of the product firsthand, something that remains incredibly important and cannot be fully replicated online,” Mark Ralea added “Our wholesale strategy is designed to complement our membership model, not compete with it. Retail partners play an important role in helping new consumers discover the brand in a more tangible and accessible way while allowing us to expand our reach across different markets and audiences.”
Sponsorship of the Athlete & Influencer Programme
As part of the ISPO Athlete & Influencer Programme, Powered by Fabletics, the brand will work closely with athletes, creators and ambassadors attending the event, further strengthening relationships with its existing global influencer community while creating opportunities to connect with new talent and partners.
“We currently work with more than 1,500 influencers in our monthly campaigns across Europe as part of #TeamFabletics but opportunities to interact with our ambassadors in person are rare,” said Daniel Klarkowski, VP Brand Communications & Partnerships for Fabletics Europe. “ISPO gives us the chance to bring that programme to life through more engaging experiences and by building a stronger emotional connection with our supporters.”
The brand also sees ISPO 2026 as an opportunity to introduce new creators and industry partners to the Fabletics experience in a face to face environment.
“Face-to-face interaction is incredibly important to us, not only because it allows people to experience the quality of the product directly, but also because it gives us the opportunity to showcase the people behind the brand and the energetic spirit of the business in a real-world environment,” Mark Ralea pointed out. “The value of in-person relationship building with retailers, buyers, creators and ambassadors was a major driver behind our decision to invest in ISPO, and we’re looking forward to meeting partners from across the industry throughout the event in Hall 1 - Stand: 1E10”
Speaking on the partnership, Soraya Gadelrab, MD of ISPO at Raccoon Media Group, said: “Fabletics is a globally recognised brand with strong relevance across fitness, fashion and lifestyle, making them an exciting addition to this year’s exhibitor line-up. We are thrilled to be partnering with them on the ISPO Athlete & Influencer Programme, Powered by Fabletics, as we continue to evolve ISPO into a more immersive and commercially relevant experience for the industry.”
Fabletics joins a growing roster of global brands confirmed for ISPO 2026, as the event continues to evolve its platform for the international sports, fitness and active lifestyle industry. Organised by Raccoon Media Group in partnership with Messe München, ISPO 2026 will bring together leading brands, retailers, distributors, athletes, influencers and industry professionals from across the sector.
The announcement reflects continued momentum for ISPO as it evolves its platform and experience for the global sports, fitness and active lifestyle industry, bringing together leading brands, retailers, distributors, athletes, influencers and industry professionals from across the sector.
With more than 850 exhibitors already confirmed and strong retailer engagement from names including INTERSPORT, Ellis Brigham, Decathlon and Amazon, ISPO 2026 is expected to welcome over 25,000 industry professionals and key opinion leaders to Amsterdam this November.

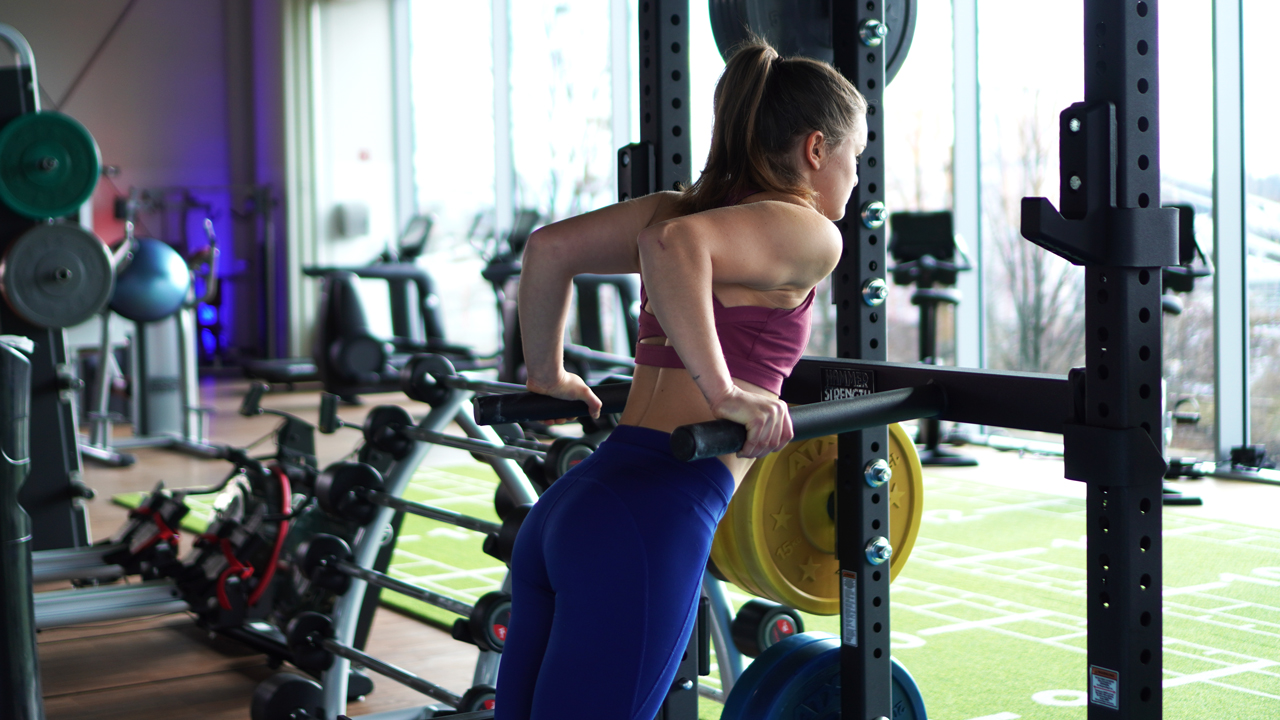
Do you need a dynamic and versatile workout that will build strength, flexibility, and endurance, all while challenging your core stability and balance? Look no further than TRX exercises! When done with proper form and technique, TRX workouts and TRX exercises will deliver a full-body workout that targets multiple muscle groups and improves overall fitness. However, for beginners, figuring out the right way to execute TRX moves can be quite hard. That's why we have put together a comprehensive guide to the best TRX exercises, complete with step-by-step instructions to help you get the most out of your suspension trainer and achieve your fitness goals.
TRX bands or TRX suspension trainers offer a versatile range of exercise options that cater to all levels of fitness. Body weight exercises can be made easier or harder by combining them with TRX workout, making them highly adaptable to individual needs. With the suspension trainer's inherent instability, you can perform functional exercises that target the entire muscle chain or isolation exercises that focus on specific muscle groups. Additionally, TRX workouts are perfect for core strengthening exercises. However, caution should be taken when performing jumps with one foot threaded into the TRX, as any misjudgment during the movement could lead to a fall.
In this guide we will take a Step-by-Step look at the best TRX exercises, TRX workouts and TRX moves that you can perform with TRX straps.
Regardless of exercise and equipment: the execution must be right for the training to fulfill its purpose. The TRX is a very good tool to train several important athletic skills.
But there is one ability that stands out in particular: The stabilization of the entire body in space while hanging from the sling. If you row in the TRX, push yourself up out of the arms or hold yourself on one leg, you will notice this very quickly. Only if you make your body stable in the right areas (especially in the core), can you work out cleanly over the full range of motion. Therefore the highest quality criterion is body tension.
Our next standard also helps here: If you want to keep the body core under tension, you should not move too uncontrolled. A correct, controlled speed of movement, especially when giving way, is essential. When moving against gravity (e.g. upwards when pushing up or rowing) you can work a little faster. Rule of thumb: "Quickly up, controlled down."
The last quality to be considered is especially important for one-legged TRX exercises: Movement is best when the balance is still present. Those who are still heavily swaying should first regain their balance before the next repetition of a TRX exercise is performed.
With the right exercises and appropriate training standards, nothing stands in the way of training with the TRX!
The best TRX exercises are:
In the following we explain which exercises can be used for training and how.
Starting position
We start in a straight position with the legs about shoulder width and the tips of the feet pointing slightly outwards. The shoulder blades are contracted and the belly is on tension.
Depth Position
To get into the low position we push our knees outwards forward and at the same time our hips backwards. We keep our balance by leading our arms forward. It is important that the back remains straight. We hold our chest high and look forward. From here we push ourselves up again by a powerful hip and leg extension.
Starting position
We hang in the TRX with stretched arms and bent legs. Our feet are on the ground and our hips are set. We pay attention to abdominal tension and initiate the movement to the high position by pulling the shoulders away from the ears before we start bending the arms.
Interim position
After we have pulled our shoulders away from the ears, we begin to bend the arms powerfully. We can also help ourselves out of our legs - but only as much as it's necessary. The arms and back should still do most of the work! Afterwards we lower ourselves as slowly as possible back down to the starting position.
Starting position
We stand in the TRX with bent arms in a one-legged stand. One leg goes forward with the toes raised and we stand stable on the other foot. In doing so, we grip the ground with our toes for stability. By moving the seat backwards we initiate the 'transition to the low position'. We maintain abdominal tension and a straight back, i.e. we bend from the hip.
Interim position
When lowering down we support ourselves with our arms in the TRX until we sit on our heel. The other leg is stretched straight forward and held in the air. After a short break, we push ourselves out of the bent leg and back up again with the support of our arms. The arms only help as much as necessary, the majority of the work is done by the leg. Of course we train this on both sides!
Starting position
We stand one-legged there, our back foot is threaded in the TRX. First we lift our knee upwards into the hip flexion. In the next step the hip goes back into extension and we bend our standing leg.
Depth Position
In the low position we have stretched our back hip and the back knee taps the ground briefly without resting there. The front hip and the front knee are bent. From here we push ourselves powerfully upwards from the supporting leg and return to the starting position. Of course we train both legs in this way.
Starting position
We take a stretched body position with the feet in the TRX loops. Our legs as well as our hips are completely stretched and our stomach is on tension. From here we bend our legs by pulling our heels towards the buttocks. At the same time, our body lifts itself off the ground by stretching our hips.
Interim position
In the upper position our heels are pulled towards the buttocks and our body is only with the shoulder blades on the ground while our arms stabilize us. From here we move slowly and controlled back to the starting position - burning leg curls guaranteed!
Starting position
As starting position we are in a high plan position with our feet threaded into the TRX. We pay attention to a solid stomach tension and contracted shoulder blades. Our arms remain continuously stretched during the exercise. We initiate the knee tuck by pulling the knees towards the chest until our weight is in our hands.
Interim position
The intermediate position seems almost like the crow's position from yoga, but there is no relaxation here. The abdominal muscles and hip flexors work at full speed, while our shoulder and arm position stabilizes us. From here we slowly move back to the starting position under control.
Starting position
In this case we do not move the whole arm behind us, but bend our elbows with the palms of our hands pointing towards us. This causes our arm flexors to pull our body weight forward towards the TRX.
Interim position
In the bent position of the arms we spend a short break. Then we return to an almost stretched out arm position at a slow and controlled pace. It is important not to lose the tension in the muscle.
Starting position
We stand with high or chest high elbows and bended arms leaning into the TRX. We pay attention to a solid abdominal tension and slight tension also in the triceps and shoulder. From here we move our arms into a stretch in front of our face.
End position
The end position in both variants corresponds to a stretched arm at head height. Here we do not spend too much time, but return relatively directly at a slow pace to the bent arm position. A slow return provides a light stretch and good tension in all parts of the triceps.
The suspension system is a true all-rounder. It offers a balanced body weight training for all performance levels. From pensioners to Navy Seals. In combination with HIT or HIIT, the training can also be used for strength and endurance. Thanks to the compactness of the device, you can even do this at home. And with that, one of the biggest hurdles before the training falls.
Lastly, we will answer some of the most asked questions about TRX exercises.

Train with sore muscles? Or is this a mandatory break? Do sore muscles need to fully regenerate first - or does muscle building progress if you start pumping away in the gym again straight away? Here are the answers on how to avoid overtraining and get fit again quickly after muscle soreness.
Anyone who exercises regularly and still gets sore muscles is doing something wrong. Either they are including a new exercise or sport in their training program without sufficient preparation or they are increasing the workload too much.
At an optimal stimulation threshold, which is necessary for muscle building, the muscles do not ache. They are a little tense, but you can move without restriction. This is the desired training effect to build muscles for more strength and/or endurance. This is the optimum intensity.
If the body is regularly exposed to too much stimulation through sport, there is a risk of overtraining. The desired effect fails to materialize and performance even declines.
In concrete terms, this means that people who continue to train despite sore muscles and do not take a break weaken their performance - even strains, muscle tears or even muscle ruptures can occur.
Sore muscles are an alarm signal from the body. The pain indicates that certain muscle areas have been overused.
The principle: every movement of the human body involves muscles, which make up 45 percent of our weight on average. When the muscles contract, the tendons move with them and pull on the bones.
If a certain movement is performed regularly, the muscle cells within the muscle fibers strengthen. However, if the exercise causes overload, the body needs significantly longer than the usual 24 to 48 hours to regenerate.
Only after the supply of nutrients to the cells is balanced again are the muscles resilient again, for a certain period of time even stronger than before. This is deliberately exploited during training to build muscle.
The word "hangover" in sore muscles comes from "catarrh", which actually refers to a disease of the throat. The feeling after drinking too much alcohol is also commonly referred to as a hangover. Either way, the word indicates a problem with the body. Something is wrong with your fitness.
If a muscle is subjected to too much strain, microscopic tears appear in its fibers. Water penetrates these tears and small edemas form. The pressure of the water causes the pain. The water also means that the muscle fibers can no longer be stretched as well, they feel stiff and tense.
The body can heal muscle cell injuries on its own, but it takes up to ten days to do so. If training is only continued after this period, the muscles are built up. There is no point before then. You risk the injuries already described and ensure an even longer regeneration cycle yourself. The duration of the forced break increases.
The good news is that you can generally train and continue doing sport despite sore muscles. Only the affected muscles should be spared during the regeneration phase. So if your legs are sore, for example, you can try light dumbbell training to prevent the loss of hard-earned muscle mass.
In general, gentle endurance sports without stretching, pushing and jumping movements are recommended, for example slow and steady swimming, walking or a moderate round on the treadmill. From a medical point of view, it is even good to exercise with sore muscles, as this stimulates the blood circulation.
But be careful: the restricted freedom of movement also increases the risk of injury.
So far, there is no effective medicine for sore muscles. Protein, i.e. protein-rich food, and plenty to drink help to stimulate the regeneration processes in the body. Heat from a sauna or hot bath relieves the pain, and light massages to loosen tense muscles are also beneficial.
However, the most effective means of prevention is and remains to optimize your training plan.

Are hours of cardio sessions on the stepper, treadmill or spinning bike really still in keeping with the times? Absolutely, but with the intensive Tabata exercises there is also a time-saving alternative. The time factor is not the only advantage, because Tabata is super suitable for muscle building and weight loss.
Tabata exercises are fantastic because they provide short but high-intensity workouts that effectively increase endurance, boost fat burning, strengthen muscles, and help improve fitness in a motivating and varied way. Just four minutes a day is enough to extremely boost metabolism, increase fitness and at the same time reduce body fat.
However, if you think you can get your dream body with a convenient shortcut, you're wrong. Tabata is so successful in terms of effective fat burning precisely because it is anything but convenient. The shortness of the workouts can be explained primarily by their extremely high intensity: 20 seconds of maximum effort - 10 seconds of rest. After a total of eight rounds, you have survived a training session.
*if you don't have a kettlebell at home, you can just take a water bottle instead
It's been ages since your last workout, and you wouldn't exactly call yourself a jock? No problem at all. Only determination and stamina are required. The beginner workout will not overtax you technically and is still highly effective.
Two exercises are enough to push you to the limit: Jumping jacks, or "jumping jacks," and burpees, which involve squatting from a push-up position followed by a stretch jump. Over the course of four minutes, the exercises are always performed in alternation, always following the principle of 20 seconds of power - 10 seconds of rest.
The workout is a full-body workout and is ideal for building up basic fitness. Four units a week should be enough at the beginning. After about three weeks, the body has become accustomed to the load and the program can and should be changed.
If you consider yourself generally fit or have already completed the beginner's workout, the next step follows: The basic condition is there - the next level can come. In order to work the individual muscle groups in a more targeted manner, two more exercises are now added to the program: Squats and push-ups.
For the squat, it is important to keep the upper body as upright as possible, to form a slight hollow back and to bend at least deep enough so that the knees form a 90 degree angle. Since many women have difficulty with the classic push-up, an alternative variation can be used here: Instead of on hands and feet, the exercise is performed on hands and knees.
Start with the well-tried jumping jacks, followed by squats, burpees and push-ups alternating according to the 20 seconds - 10 seconds principle. The workload here can be increased to five to six units per week and after three weeks, a change should be made again.
For all passionate Tabata followers, here comes the pro workout. The fitness is there, the form is on a good way - now it's time for the fine tuning. In addition to squats and push-ups, two other exercises from the world of strength sports are added to activate the muscles: pull-ups and lunges.
From now on, the sequence of exercises is squats, pull-ups, lunges, push-ups: both squats and lunges target the muscles in the legs, buttocks and torso. For lunges, simply alternate between taking a step forward and squatting.
Push-ups and chin-ups are excellent exercises to activate the entire upper body. Alternatively, those who can't do pull-ups can switch to jumping chin-ups. Simply jump up to the bar, take advantage of the momentum to pull yourself up and release in a controlled manner.
Of course, the Tabata principle also applies to the professional workout - six units per week should now be no problem. To ensure that the necessary recovery is not neglected, the cycle can be started again from the beginning after another three weeks.
We start with the classic push-ups, which primarily activate the chest, shoulders and triceps. This is followed by a full-body exercise known as the burpee or squat jump, in which you squat down from the push-up position and then jump off with your arms stretched upwards.
In the Mountain Climber - round three - the starting position is also the push-up position. Now bring the bent legs forward alternately so that the knees almost touch the outer elbows. Finally, the crunches in the final round target the abdominal muscles once again - lie flat on your back, bend your legs, position your hands in the area of your temples and move your upper body in the direction of your knees.
The second workout focuses on the leg and back muscles. We start with an absolute fat burner, namely the squat. Form a slight hollow back, keep the upper body upright and go down as low as possible. Hardly any other exercise is as effective when it comes to burning fat and increasing fitness.
Lunges follow: Take one step forward and now squat. As with the squat, this exercise particularly targets the quadriceps and gluteus, or buttock muscle. Then the back and biceps are activated with pull-ups.
Jumping jacks follow. With this classic exercise, you can really step on the gas again and challenge your body holistically.
The first two workouts each contain four different exercises. With a 20-second load and 10-second rest, eight sets are completed in four minutes. Those who have completed all four exercises in the first round can immediately look forward to the second round.
The focus of the third workout is once again increasingly on the leg muscles. And there is a reason for this, because the quadriceps and gluteus are among the largest muscle groups in the body. Consequently, a lot of energy is burned during leg training.
The following exercises are available: Spinning, sprinting or jumping rope. After deciding on two exercises, they are always performed in alternation: Four rounds of sprinting and four rounds of rope jumping, this is how a possible composition could look like.
With one Tabata workout per day you are already well positioned. However, in order to address all muscle groups evenly and to have some variety, a different workout should be selected every day. If you go full steam ahead six times a week, you can also take a day off to regenerate your muscles with a clear conscience.
20 seconds sweating - 10 seconds recovering: That's the principle of Tabata. But what do you have to watch out for in this short workout? First of all, Tabata is not the same as a casual workout on a stepper or treadmill - the term High Intensity Interval Training (HIIT) is not a coincidence. HIIT, is no coincidence.
Above all, the cardiovascular system is extremely challenged during Tabata. In order to give full intensity and to be able to go to the individual limits, therefore, one thing is important above all: robust health. Anyone who is struggling with physical limitations should definitely seek the advice of a doctor beforehand.
Once you've conquered your inner weakness and banished the fear of a nasty muscle a che, you should set realistic goals. Our body does not change overnight and the path to the desired feel-good figure will take some time.
To stay motivated on the ball, it is important to select suitable and, above all, varied exercises. It is also advisable to document your personal performance in a training diary.
The following applies to all workouts: Before getting down to business, warm up properly! An additional five to ten minutes should be allowed for this.
In general, warming up before a workout is important to minimize the risk of injury. A Tabata workout uses a wide variety of muscle groups, so the whole body should be warmed up. Possible exercises include the following:
Warming up the knees is especially important because burpees can cause joint problems that can be avoided by proper warm-up. Just 30 seconds per warm-up exercise is enough to greatly minimize the risk of injury.
Still have questions about Tabata and HIIT? Here you will find the answer to the most frequently asked questions!
Yes and no. With a Tabata workout, you burn a lot of fat in a very short time and effectively work on your endurance. However, the World Health Organization (WHO) recommends 2.5 hours of exercise per week, or 75 minutes at high intensity. Six Tabata sessions of four minutes each is just 24 minutes, but a Tabata workout is also more intense than classic HIIT.
For steady progress, it's important that your workout plan keeps changing and adapting to your fitness level. Every three weeks, the exercises from a Tabata workout should be adjusted to provide new muscle stimulation.
A Tabata workout is more intense than comparable bodyweight workouts. The target heart rate for this workout method is 100 percent, while the target heart rate for a HIIT workout is between 80 and 95 percent. However, the intervals in HIIT workouts are longer, as are the rests.
Tabata exercises have many positive effects on your body. A Tabata workout helps you lose weight, it strengthens your muscles and supports your cardiovascular system. In addition, interval training has other benefits:
Yes, you can definitely build muscle with Tabata exercises, especially if you were previously untrained or had little experience with intense exercise. Although Tabata is mainly known as a high-intensity cardio workout, it can also lead to some muscle hypertrophy as different muscle groups are used during the exercises. Tabata helps with definition and works a wide variety of muscle groups. However, you can't build muscle as effectively with this training method as you can with dumbbells.
Calisthenics has been a huge hype in the fitness scene for years. It is a street workout in which muscle building is achieved through static or dynamic bodyweight exercises. The best calisthenics exercises are simple yet highly effective, often requiring nothing more than a pull-up bar. With simple aids, these can be supported or made more difficult if necessary. Despite its simplicity - you hardly need more than a pull-up bar for the workout - calisthenics has enormous effects on the entire body. So it's not for nothing that the trend has spread like wildfire around the world.
The term "calisthenics" comes from the Greek and translates as "beautiful strength". In contrast to pure strength training with weights, here it's about more: In calisthenics, the movements are performed in a controlled and graceful manner. The basic exercises do not require any equipment at all. The best basic Calisthenics exercises are for example:
With time, you can then integrate some tools into the training. These are in particular:
Since the sport is becoming increasingly popular, there are now even special outdoor calisthenics parks in every major city, where you can find bars, parallel bars and other sports equipment.
The advantage is that you don't have to train alone in a quiet room, but can get in touch with like-minded people and exchange ideas. If you don't have a park near you, you can also use climbing frames in playgrounds, clothes poles or branches in the woods that can bear weight.
Even in the origins of calisthenics exercises, which partly originated in New York in the street workout scene, athletes first integrated street signs, benches, scaffolding or wall ledges into the workout. This simplicity - effective training when and where you want - is what makes calisthenics exercises so popular. Even people who have little time and money can get a strong and supple body.
With Calisthenics exercises you can stabilize your musculoskeletal system in the long run and improve your posture. Better posture reduces postural deformities caused, for example, by sitting at a desk for long periods of time. Calisthenics exercises can help reduce or relieve shoulder, neck and throat tension.
As you learn to be more aware and mindful of your body overall, you will automatically develop a healthier gait and more ergonomic movements. Mobilization, which is part of the workout, is also a type of fascial training that allows your muscles to become flexible and supple. Because of the very deliberate, controlled movements, calisthenics can also be somewhat meditative. Athletes of the sport often report feeling more focused and internally balanced as a result of regular training. In addition, the potential for injury is reduced compared to training that consists of jerky and hectic movements.
Last, of course, muscle is built, helping to improve overall fitness, strength and well-being. In addition to the calories burned in extended workouts, building muscle also benefits calorie balance, as muscle burns more calories than fat. Calisthenics exercises, unlike classic weight training, have the great advantage of being a full-body workout. It uses all muscle groups at the same time and thus also promotes coordination. In addition to shoulder, arm and chest muscles, push-ups alone also train the entire body core, which stabilizes and holds you so that you don't sag downward during the exercise. Strength training on equipment, on the other hand, often trains only isolated muscles and thus also neglects the application-related coordination of the muscle groups with each other.
When you start calisthenics training, it is important to first practice the basics and build up a certain basic fitness. Only when you have mastered these and can perform them in a clean and controlled manner does it make sense to move on to more difficult calisthenics exercises. This is especially important to avoid injuries and to ensure long-term progress and motivation.
The difficulty of Calisthenics exercises can be progressively increased for all exercises: when you realize that you have mastered an exercise, you replace it in your training plan with a more strenuous variation or increase the repetitions and intensity.
The best example of this is push-ups: if the "normal push-ups" are still too difficult for you, you can, for example, raise your hands and thus reduce the weight on your arms. You can then gradually reduce the difference in height between your hands and feet. If push-ups are too easy for you, you can perform the exercise with one arm or vary the height of the foot position.
Here are some of the best Calisthenics exercises for beginners:
The best calisthenics exercises for beginners include:
Once you've had some practice and have a better understanding of your body, it's time to move on to the typical calisthenics exercises on equipment. It is helpful to think about your strengths and weaknesses in advance. This way, when you create a training plan, you can adjust the weighting so that you gradually compensate for your weaknesses. For example, if you notice that your abdominals always sag a little in the plank, you can train your abdominal muscles more. If your upper body lacks strength, you can focus on push-ups and pull-ups. If you can't do an exercise like the pull-up yet, there are again easier variations to strengthen the same muscle groups. Advanced exercisers usually train three times a week without any problems. If necessary, a fourth, lighter workout can be added. However, be careful not to overdo it and learn to listen to your body. If your muscles are very sore, it is better to take a break and rest for a few days until you get back to training. Below you will find some of the best advanced calesthenics exercises:
Unless you are pursuing an individual goal that requires its own training parameters, it is recommended, whether beginner or advanced, to perform two to three sets of all calisthenics exercises per training session. In the beginning, you should perform between 12 and 15 repetitions of each exercise in order to train your strength endurance. You should not reach muscle failure, especially if the exercises are new to you, so that you can always concentrate on the correct execution and technique. After each set, take a break for about two minutes to catch your breath and let your muscles recover a bit. If you find that you can't do 12 reps, you can try replacing the exercise with an easier variation. If you still have strength after your set, it's time to replace the exercise with a more strenuous alternative.
Incorporating the best calisthenics exercises into your routine will help you build strength and mobility efficently. Of course, it is important to maintain your enjoyment of the workout. Try to find out what motivates you and keeps you going. This could be a training group or buddy. You may also want to keep a small notebook where you can document your workouts and keep track of your progress. Soon you will realize that your body is capable of much more than you always thought.
Of course, it is important not to overstrain yourself, especially at the beginning. Otherwise, in addition to severe muscle soreness, more serious overuse symptoms can force you to take a longer break from training. Give your body the necessary break so that you can quickly get fit again after the muscle soreness. In addition to the exercise selection, you can also adjust the training frequency accordingly. For example, start by exercising only twice a week. When you feel that your body is getting used to the strain over a period of a few weeks, you can add a third training session. Each workout should also include a warm-up and cool-down. Preparation and follow-up are essential to achieve good performance in training and to reduce the risk of injury. So now let's move on to the specific exercises. The following three exercises are wonderful for beginners to build strength and get into training. In addition, all three do not require any equipment or tools.
In average, calisthenics burns about 300 - 500 calories per hour. However, it's about how intense your workout is - a beginners workout will burn less calories than exercising on high intensity.